Have you ever thought about creating your own electric skateboard? This guide is perfect for hobbyists ready to explore the DIY e-board universe. Making your own board is a unique mix of art and technical skill. You get to shape your ride according to your tastes. This often costs much less than what you’d pay for a premade one.
Choosing the right parts like the deck, wheels, motor, and battery requires careful thought. This approach lets you design the board your way, ensuring it works just how you need it to. *Imagine the pride of cruising on a board that you’ve put together yourself. It shows your smartness and skill.*
Some important facts can help you get started. For DIY electric skateboards, a motor with about 50 mm diameter and less than 300 KV is best. It offers good power. Pick an ESC that can handle a bit more power than your motor’s peak. High-cell batteries boost speed. Timing belts and pulleys make the build cheaper and more durable. Also, using Arduino and solid casings can improve your board’s features and safety.
Are you ready to start this exciting project? Follow our simple steps to enjoy creating your own board. Let’s dive in!
Introduction to Building a DIY Electric Skateboard
Electric skateboards are becoming very popular. Many people choose to build their own. They like to customize their boards and save money.
Building a DIY electric skateboard is an adventure. It’s about learning and choosing the right parts. Start with a stable longboard deck and top-mounted trucks. These provide room for the electronics.
Choosing your own parts is a big plus. Motors like the Turnigy SK3 213kv and NTM Prop Drive 270kv are top picks. For the battery, Lithium Polymer (LiPo) types are great due to their power weight. Common setups are 4S1P and 8S2P.
Assembling the drive system is crucial. A pulley ratio of 36T to 14T improves performance. Proper motor mounting is also essential to avoid belt issues. The right electronic speed controller (ESC) must match your motors.
Building your e-skateboard is not just fun but also economical. High-end commercial boards cost over $1000. A DIY can be built for $300-$500. This gives you the freedom to choose high-quality parts or budget-friendly ones.
In the end, DIY electric skateboarding is rewarding. You get a custom skateboard. Plus, you learn a lot about electronics and mechanics.
Choosing the Right Deck for Your Electric Skateboard
Choosing the right deck is crucial when you’re building an electric skateboard. This first step greatly affects your skateboard’s performance and stability. With a market worth over $300 million, there are many decks for different styles and preferences.
Longboard vs. Skateboard Deck
Deciding between a longboard and a skateboard deck is key for electric longboards. Longboards are more stable and offer more space for components. They are usually between 26″ and 44″ in length. A popular choice is the Loaded Cantellated Tesseract Longboard Deck.
Skateboard decks are more agile but offer less space and stability. Longboard decks, especially those made of maple wood, are durable and perform well over time.
Top-mounted vs. Drop-through Trucks
Choosing between top-mounted and drop-through trucks is another important decision. Top-mounted decks have trucks mounted underneath, offering more clearance. This setup is common for electric skateboards.
Drop-through decks, on the other hand, have a lower center of gravity. This improves stability at high speeds. Veymax makes high-quality, water-resistant trucks suitable for both styles.
Selecting Wheels and Trucks
It’s important to pick the right wheels and trucks for a smooth ride. Wheels usually range from 90mm to 110mm. Softer wheels absorb shocks better on rough roads. Veymax’s Esk8 wheels work well with many electric skateboards.
Here’s a look at different decks, wheels, and trucks:
| Component | Recommendation | Notes |
|---|---|---|
| Deck | Loaded Cantellated Tesseract | Wheelbase: 24.5-26 inches |
| Wheels | Veymax Esk8 Wheels | Range from 90mm to 110mm |
| Trucks | Drop-through | Lower center of gravity |
| Trucks | Top-mounted | More ground clearance |
Choosing the right electric skateboard trucks is essential, especially for motor mounting. Veymax offers quality options perfect for DIY projects. Regularly looking after your skateboard keeps it in top shape for a reliable and fun ride.
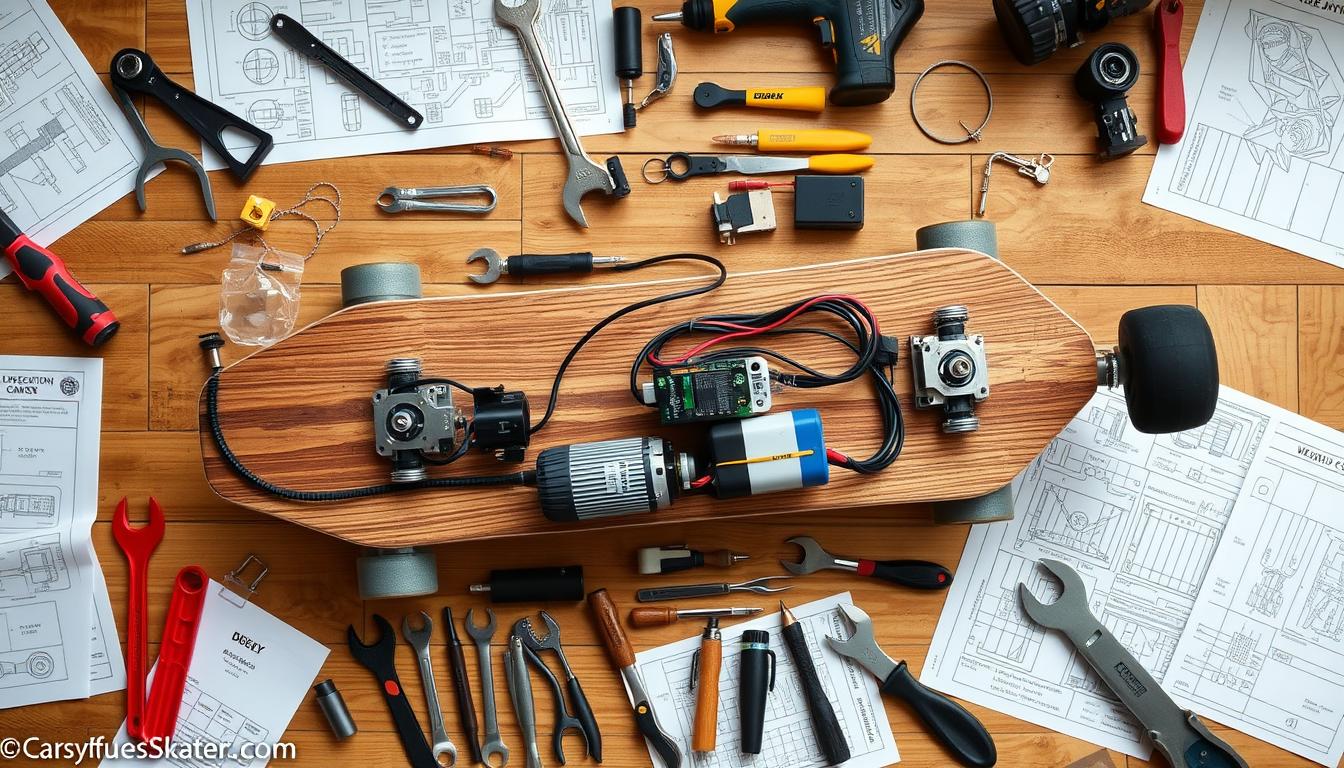
How to Build a DIY Electric Skateboard: Gathering Your Components
Finding the right parts is key to making an electric skateboard. This part talks about choosing the motor, ESC, batteries, and remote.
Selecting the Motor
There are two main kinds of motors: hub motors and belt-driven motors. Hub motors go inside the wheel and look neater. They also need less care. Belt-driven motors, like the Turnigy SK3 213kv or NTM Prop Drive 270kv, offer more power. They work well with different wheels and replacing them is easy. For more on how long parts last, see this article.
Choosing the Right ESC
The ESC controls power and the skateboard’s speed and direction. It must match your motor’s specs. A good ESC, like those from Alien Power Systems, keeps your board running smoothly.
Battery Options and Their Safety
Skateboards usually use lithium-ion batteries because they last longer and are powerful. The capacity affects how far you can go on one charge. You can choose LiPo or LiFePo4 batteries for safety. Both are strong, but you should protect them well against water and shocks.
Remote Control Choices
Picking a remote control is about comfort and how easy it is to use. Most are wireless and let you control speed and braking. Alien Power Systems offers kits with a remote that works well with their motors and ESCs.
It’s important to choose components carefully, thinking about power, safety, and control. A well-matched set of motor, ESC, batteries, and remote makes for a great build.
| Component | Options and Considerations |
|---|---|
| Motor | Hub Motor (Low maintenance); Belt-driven Motor (Powerful, Versatile) |
| ESC | High Current Support, Compatibility with Motor Voltage and Current |
| Batteries | LiPo vs. LiFePo4 (Energy Density, Safety, Water Resistance) |
| Remote Control | Ergonomics, Ease of Use, Wireless Features |
Preparing the Deck for Installation
Getting your deck ready is key before adding electronics to your DIY e-board. This makes sure you have a tidy setup. Let’s go over how to prep your deck.
Removing Grip Tape
Start by taking off any old grip tape. This gives you a clean base. Warming the tape with a hairdryer makes it easy to remove without damage.
Measuring and Drilling Holes
Correct measurements are vital when you’re drilling holes. Measure carefully then drill once to prevent problems. Every hole must line up for your electric skateboard kit parts to fit right.
Cleaning and Prepping the Deck
After drilling, clean the deck well. Take off any adhesive and dirt. A clean deck means the new grip tape and parts will stick better and not move around.
Applying Grip Tape for Enclosures
Next, put on new grip tape. It makes your DIY e-board look good and stops sliding of battery and motor cases. Good grip tape adds to both looks and performance.
For more on DIY electric skateboards, see this detailed guide. Prepping your deck right is a crucial first step for a great build.
Installing the Motor and Drive System
Building a DIY electric skateboard kit means getting the motor and drive system right is crucial. These steps are key for the best push and performance:
Start by fixing the motor to the trucks firmly. Use a reliable motor mount to keep it secured. It’s critical to align the motor with the wheel pulley properly. Wrong alignment leads to issues and wear too soon.
Then, adjust the drive system’s belt. It should be tight enough to prevent slipping but still have a little give, about a 1/2″ when pressed. This right tension boosts performance and increases the belt’s life.
To understand the value of making your skateboard, look at this data:
| Building Your Own | Purchasing Pre-made |
|---|---|
| Cost savings, often half the price | Higher initial investment |
| Customization for performance and style | Limited to marketed designs and specs |
| Learning and troubleshooting skills gained | Less hands-on experience |
Electric skateboard motors range from 500-3000W. More watts mean more torque and better hill climbing. By choosing your parts, you can focus on speed, distance, or how well it handles different places.
Properly installing the motor and drive system is crucial. It ensures your customized electric skateboard works its best. By paying close attention to the setup and tension, you get a ride that’s smooth and safe. Building your electric skateboard also saves money and makes you feel closer to your ride.
Setting Up the Electronics
Setting up the electronics brings your electric skateboard to life. It is key to mount and secure components right for both function and safety. Let me walk you through this important process step by step.
Mounting the Motor Controller
The motor controller acts as your skateboard’s brain. You must find a secure spot on the deck for it. Make sure it gets enough air. It should be attached with strong adhesives or bolts. This keeps it stable during rides and avoids damage or disconnects.
Securing the Battery Enclosure
Your batteries need a strong enclosure for protection. It should allow airflow to avoid overheating and be safe from water. Bolts or strong Velcro will keep it in place.
Wiring and Connecting Components
Now it’s time to connect everything. Start with the electric skateboard kit by following the wiring guide. Use connectors like 5.5mm bullets, EC5, or XT90 for secure fits. All connections need proper insulation to avoid shorts and fires. Organizing the wires prevents tangling and parts interference.
Ensuring Proper Electrical Safety
Safety with electricity is very important. Always check your connections and the pairing of your remote to the controller. Fully cover all wiring connections and look out for bare wires. Keep an eye on your skateboard batteries to not overcharge them. Following LiPo battery care is key to avoid risk of damage or fire.
- Mount the motor controller securely.
- Ensure the battery enclosure is robust and well-ventilated.
- Follow the wiring diagram for connecting components.
- Insulate all connections and check for proper pairing of remotes.
By doing these steps with care, your DIY electric skateboard will work safely and reliably.
| Component | Cost Range | Notes |
|---|---|---|
| Motor Controller | $85 | Hobbywing EZRUN-150A-Pro recommended at ValueHobby.com |
| Battery | $22.07 each | ZIPPY Flightmax 5000mAh 3S1P 20C; need two for 6S setup |
| Connectors | Variable | 5.5mm gold bullet connectors, EC5, or XT90 plugs |
Testing and Fine-Tuning Your Electric Skateboard
Now that your custom electric skateboard is ready, testing and fine-tuning it is key. Start with a full battery charge. Also, check that the remote control syncs up with the board. Make sure your speed controller, especially a VESC, is set right for even acceleration and braking.
Start your tests in a clear, flat space. This lets you see if there are issues with steering, the motor, or battery. Check important details like the top speed, which can hit 28mph, and range, going over 11 miles on one charge. These show if your board performs well and is fun to ride.
Watch the belt tension and adjust as needed to dodge slippage or damage. Make sure everything, like the Flipsky 6354 190KV motor and HTD5 225mm x 15mm timing belt, is tight and right. Be careful with LiPo batteries because they’re very powerful and can be risky. Securing the battery box and checking the XT90-S Anti Spark plug can keep you safe.
Tuning might mean changing gear ratios or picking motors for different terrains. Adding features like RGB WS2812B LED lights can make you more visible. For more details on DIY electric skateboard building and tuning, check out this helpful guide. Getting everything to work together ensures a smooth and safe ride, making your DIY project both useful and fun.

I’m John Peterson, a passionate skater, blogger, and lifelong enthusiast. I’ve been skating for over 9 years and have gone on to write a blog dedicated to the sport of skating and its culture. Through my blog, I strive to share my knowledge and experience of the sport with all who are interested. From beginner tips, tricks, and equipment reviews to interviews and event coverage, I cover it all. So read my blog as I explore the wonderful world of skating!